|
|
Writing a Simple Bean |
You can use the BeanBox's File|MakeApplet... menu item to generate an applet from the BeanBox contents. Making an applet from the BeanBox creates
- A JAR file containing class files and serialized data
- A test HTML file that uses the JAR file (and any other JAR files needed)
- A subdirectory with Java sources and makefile
- A readme file with complete information about the generated applet and all files involved.
Take the following steps to generate an applet from the BeanBox:
- Use the Juggler example that you made in the events section. If you saved that example to a file, load it in the BeanBox using the File|Load menu item. If you didn't save it, follow the steps in the events section to build the example. The generated applet will have the same size as the BeanBox frame, so you might want to adjust the BeanBox size to the size of the applet you want.
- Choose File|Make Applet to bring up the MakeApplet dialog:

Use the default JAR file and applet name for this example. Press the OK button.That's it. The generated files were placed in the
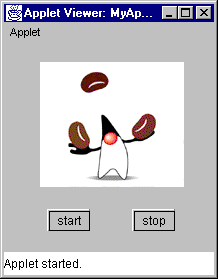
beanbox/tmp/myAppletdirectory. You can inspect your handiwork by bringing up appletviewer in the following way:appletviewer <BDKInstallation>/beanbox/tmp/myApplet.html.Here is what you will see:

Don't forget to look at the generated myApplet_readme file, and the other files generated.
Generated applets can be used in any JDK 1.1-compliant browser. The appletviewer is a good test platform. Another fully compliant browser is the HotJava browser The preview2 Internet Explorer 4.0 release does not yet support JAR files, and you will have to expand the JAR and HTML files that are generated. Also, a deserialization bug causes components to not listen to mouse events. See the generated readme file for more information. The generated applet will not work in Netscape Communicator versions 4.0 and 4.01; versions with full JDK 1.1 support are expected later this year.
|
|
Writing a Simple Bean |