


| О КОПИРАЙТАХ |
| Вся предоставленная на этом сервере информация собрана нами из разных источников. Если Вам кажется, что публикация каких-то документов нарушает чьи-либо авторские права, сообщите нам об этом. |
|
|

|
 |
[Top] [Prev] [Next] [Bottom]
Transform Tools
The Move Tool

The fact that the Move tool moves selections should be obvious, but the Move tool works in different ways. You can move floating selections, you can move the entire image or layer, and you can move the selection shape. We have already discussed the fact that GIMP offers a "fake" move tool symbol, which transforms your selection to a float. This means that you have to remember to change to the move tool as soon as this happens. You can also ignore the "fake move tool" and turn straight to the "Float" command in the Select Menu. This procedure assures you of the float's position, and IF you decide to move it, you use the move tool in the normal way.
When you use the Move tool with a Floating selection, you'll notice that the double-arrow symbol changes to a single arrow when the pointer is outside of the selection. Mouse-clicking when the single arrow is visible causes the float to Anchor to the layer ( merge with that layer) which was last active.
If you don't have a floating selection, using the move tool causes your entire image to move (or the active layer, if you have layers).
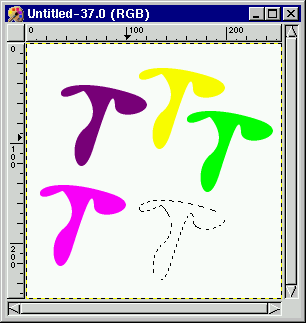
If you don't want to move a floating selection or a layer - when you just want to adjust the position of the selection, use the Alt-key. Observe the difference! You move only the empty form of the selection with the Alt-key, not the selection with its contents! This option is only available for normal (empty)selections, you can never move a floating selection with the Alt-key. This option allows you to use the selection as a template - you can move the selection around and fill it every time you move it. Note, the Move tool or a selection tool must be active for this to work.
The Move-tool has an extra feature which I really like. You can nugde the selection with the keybords cursor keys (just like in Corel Draw), nudge=moving very precise in small steps. Pressing Shift will increase the length of these steps.
One more thing about moving - when you make multiple selects, the GIMP treats them as a unit. That means that you can't move one selection closer to another, because the whole lot will move together as one.
Magnifying glass or Zoom tool

To zoom in, you simply click in your image, - to zoom out, press the (-)key, or Shift click.To zoom a specific part of the image, drag diagonally across that part, and release the mouse button. There are also several shortcuts to zooming in the Wiew/Zoom menu. You can get nine different scales, from 16:1 - 1:16. To get scale 1:1 press (1).

I recommend the excellent option"Allow Window Resizing". This means that the canvas size will always adapt to the amount of zoom you use, so you'll always be able to see the entire image regardless of zoom level. If you don't want to use this option, you can press Ctrl+E for Shrinkwrap - this procedure will also adjust the canvas to image size.
There is another extremely useful item in this menu; the "New Wiew". With New Wiew, you open a new window showing your image. This enables you to watch your creation from several windows, each with different focus and zoom. It is still the same picture, and the changes you make appear in all of the windows. If you want to try out different versions of your image, press Ctrl+D, for Duplicate. The duplicate windows are separate, changeable copies of your original image.
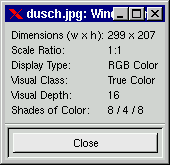
There is also a "Window Info" dialog in the Wiew menu, which will give you up-to-date information on the active window, such as dimensions, scale ratio and display type.
The Crop Tool

This tool corresponds to the "scissors" in Photoshop. You can crop a scanned image, if you just want a part of the picture. To crop, you drag the marquee diagonally, and release the mouse button when you are satisfied.
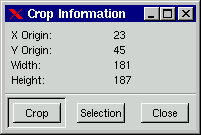
Press the crop button in the dialog box or click inside the markings, and whatever's inside of the cropmark will be your new image. The Crop Information dialog box informs you of the crop placement in x-y origin and width/height in pixels. The cropmark can be placed very accurately, you can move it (lower left or upper right corner) or resize it (opposite corners). It appears very clearly against the rulers, and you can use "nudge" (see Moving Selections) and "Snap to Guides" to help you further. Another option is to click the "Selection" button in the dialog box. This will automatically place the cropmark as close as possible to your selection.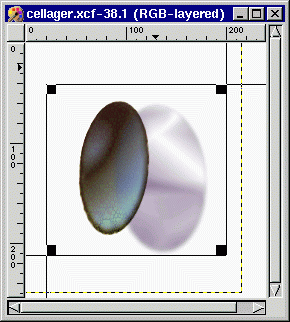
The Transform tool

It's like the "Effects" in Photoshop. You can rotate, scale, shear or distort a selection with this tool. With the Rotate tool, you rotate your selection manually. You must observ that the image can come outside your drawabel area wich will come to that you will have to resize the image.

The rotation angle is displayed in a small dialog. You can't write any numbers there, so this is no high precision tool. You can, however, use the Ctrl key, which makes the selection turn 15 degrees at a time, which in most cases is quite sufficient. 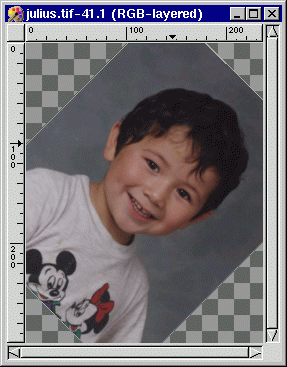
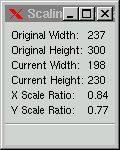
The Scale tool is quite advanced though. The little information box tells you both the original height and width of the selection a well as the new measurement. It also informs you of deformation rate in the x-and y scale ratio. The Ctrl key locks the scale in the x-term, Shift locks in y-term. Ctrl+Shift returns to the original shape, and scales proportionally - xchange=ychange.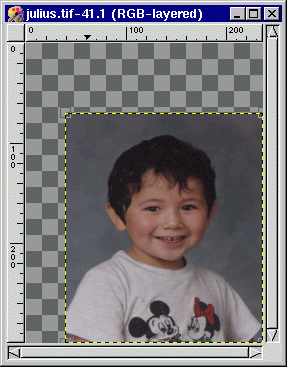

Shearing can be done in both x- and y-term, but only one at a time! If x magnitude is other than zero, then y must be zero. If you want it sheared both ways, you have to change to another tool button and then return to Transform. Dragging up and down shears to y, and to the sides to x.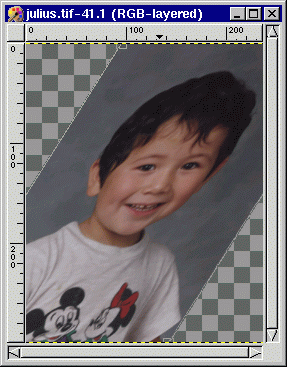
The last option is called Perspective, which isn't quite accurate, because there is no actual perspective transformation (small in the far end and large in the other). I would rather call it distort, as you can change all four displacement points independent of each other. You can certainly make something look like a perspective, but you have to do it manually. Observe that you can turn the "perspective" inside out if you like. If you let the lines of the tool marking cross or top each other you'll mirror and wrench the selection so much it'll soon be unrecognisable. 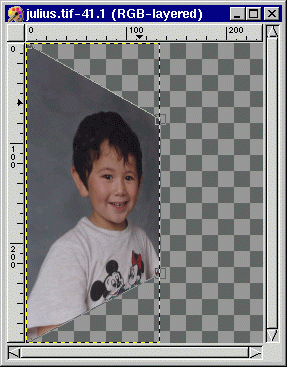
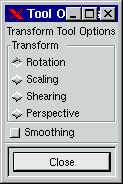
Smoothing is as you might have guessed an antialiasing option, which makes the distorted edges look better. If you don't use smoothing, you selection might turn out very rough and pixly in some edges.
The Flip tool

It does exactly that - it flips, or more accurately, mirrors the selection horizontally or vertically. If you are working with an image where you want the illusion of reflexion, whether in water, glass or metal, this is the tool to use.
[Top] [Prev] [Next] [Bottom]
karin@frozenriver.ale.se
Copyright © 1997, Karin Kylander
|