|
Selection toolsIn this chapter, we'll learn about making selections, and how to use the different selection tools. We'll also discuss why strange things happen when you try to move your selection for the first time. The Basic controls
When you have made a selection, the boundary of the selection appears with a blinking dotted outline, sometimes referred to as "marching ants". Your selection is now the only active part of your image; the rest is masked and is not affected by your operations. (If you find the blinking line distracting, the GIMP allows you to swich it on and off with "toggle" in the Edit/Select menu. If you're not happy with your selection, just make a new one; the first will instantly disappear and be replaced by your new selection. If you regret making selections at all, just click once in your image, (with the rectangular, ellipse or lasso tool active) and the selection will be gone. However, you might want to make more than one selection, or combine several selections into one - then you'll have to use the "Shift" and Ctrl" keys.
While making these additions or subtractions, remember "errare humanum est". It may be wise to keep your middle finger prepared to press the right mouse button. If you do this and then release the left mouse button, the selection you are drawing will disappear. This possibility to Undo a selection before it's finished is useful when you add or subtract or intersect. When you decide you don't like the selection you're drawing, you can undo that selection without also erasing the other "good" selections. Moving selectionsMoving selections in GIMP is not altogether intuitive, and you may well get a bit confused at this.
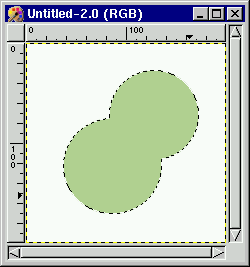
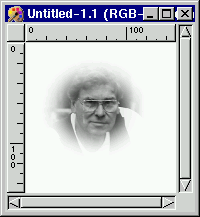
This gray subselection won't turn into an active selection until you save or delete your float. But you can use it as a mask effect. What happens is that your selection turns white (if that's your background color) - it's only inside the boundaries of the gray-lined marquee(s) (you can make lots of them with Shift) that you can see the original contents of your selection. This is a nifty little effect, but it can be rather annoying if it happened by mistake (not uncommon) Don't panic - just press Ctrl-Z (Undo) and you'll be back where you were. Read about the Move Tool for more information on moving selections. To place your selections exactly where you want them, use the horizontal and vertical guides which can be drawn straight from the left or upper ruler. To change the position of the guides, you must use the Move tool (notice how the move symbol changes into a pointing hand when it touches a guide). Snap to guides is the default set in the Wiew menu. If this option is checked, moving any kind of selection close enough to the guides, automatically causes it to "stick" or snap to it. You can for example decide exactly from which point of origin you want your square or ellipse selection to start. If you use the Ctrl key, and start dragging close enough to the point where the guides cross, that will be the centre of the new selection. Without Ctrl, the selection will start from the cross and continue in the direction you drag. You can easily adapt the size, shape and position of a rectangular or ellipse selection to the guides by drawing it within the frame of two vertical and two horizontal guides. Rectangular and ellipse selection tools
The Shift-key constricts the selections to perfect squares and circles. The selection starts from the corner, and continues in the drag direction. The Ctrl-key draws normal rectangular and ellipse selections, but with this key, selections will emanate radially from the point where you start dragging. This point is now the centre of your selection. Using both Shift and Ctrl results in circles or squares (as with Shift), but they grow from the centre an outwards (as with Ctrl). Now, if you want to use Shift and Ctrl for operations like adding, subtracting or intersecting, and at the same time use Shift and Ctrl for the operations mentioned above, it gets a bit complicated - but not impossible! (Thanks to Nick Lamb for helping out with this one!) What you have to do is this. First you must decide what the selection will be used for:
When you have decided, hold that key and then press the mouse button. Then release the key but not the mouse button. With this you have told Gimp what action you want the selection to take. Now, hold a key of your choice while dragging. This key determines what shape or starting point you want for your selection. This procedure makes it easy to add a rectangle to a selection, or make subtractions with squares or circles. It is, however, rather tricky and if you want to do some serious work using these commands I strongly recommend that you plan ahead, and that you always use the guides and rulers to place new selections correctly. You can, of course, always use Channels to perform such operations. By making white circles in a channel and putting black ones on top of them, you'll subtract a circle without having to remember what key to use, exept Shift for circle. Read more about making selections with Channels in chapter 12.
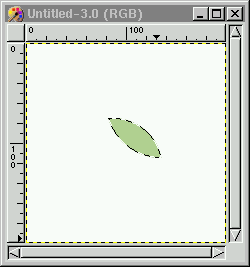
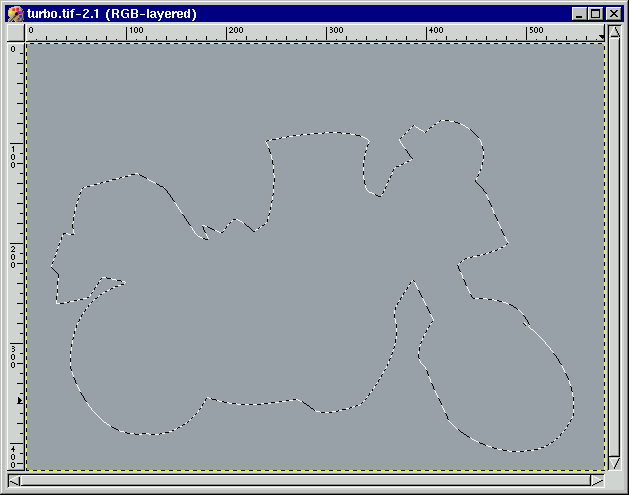
The Free selection tool
It's seldom works to try and select a complex area with just one selection tool. The lasso is an exellent tool to fix up selections with. If you see that you've missed some pixels, it is easy to correct this with Shift or Ctrl+ lasso. (As I'm sure you have noticed, the mouse isn't a very sophisticated drawing instrument. The good news is that the GIMP now fully supports ArtPad, a pressure-sensitive digital pencil. X programs have supported Art Pad as a substitute for a mouse for a long time. This means that you could use it as a pencil, but it was never pressure-sensitive. The GIMP now has patches to make this work. Believe me - working with lassos, pencils and brushes is dramatically different with an accurate tool.)
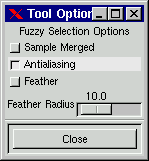
Fuzzy select
Word of warning! Check out you point of departure - if you pointed a little awry you might get the inverted selection of what you wanted - i.e. the wand selects everything exept your choise (Black, antialiased object on white background - you can get a white to gray selection instead of a black to gray one if you are not careful). Needless to say, the wand is the perfect tool to select sharp-edged objects with similar colors. It is easy and fun to use, so the beginner often starts out with using the wand a lot. A more experienced user will find that tools like the Bezier tool, Color Select or Alpha Channels are much more efficient for selection, and use the wand more and more seldom, exept for touching up imperfect selections, where the wand is very useful indeed; for example in effectively removing remains of background color from a cut and pasted selection. In the options dialog box there is a checkbox called "Sample Merged". This is an option available when you use color for an operation. It becomes relevant only when you use several layers. If this option is unchecked, the wand will only react to the color in the active layer for your selection. If it is checked it will act as if the image was flattened (layers merged) and use the merged color as it appears on screen with all layers visible. The Bezier selection tool
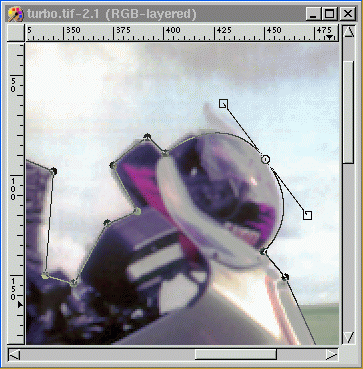
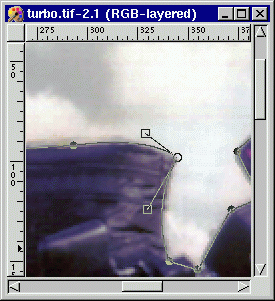
It is, however, a great advantage if you plan the placement of the anchor points, because in the GIMP, there is no way to remove or add anchor points with this tool. This means that you have lesser control over your curves. You can't regret anything, so watch out where you put your splines! Also, don't use too many - you only need one for every curve segment. ( Removing/adding anchor points would be a most wanted feature in the next GIMP version!)
The first thing you'll want to do is to move the splines to their correct position. By pressing Ctrl, you can drag and drop an anchor point any way you like. The other important thing to do is to determine what splines are to be soft, and which are to be angled. By default the handles are equal and make soft, wide curves.
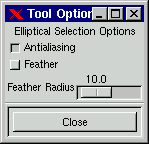
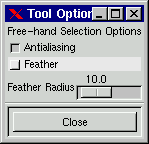
The options for the Bezier tool are Antialiasing and Feather. Read more about it in the section on Rectangular and Elliptical selection. Intelligent Scissors
[Top] [Prev] [Next] [Bottom] karin@frozenriver.ale.se Copyright © 1997, Karin Kylander |
|||||||||||||||||
|
With any suggestions or questions please feel free to contact us | ||||||||||||||||||