[Top] [Prev] [Next] [Bottom]
Plug-ins; description and function
In this chapter we'll take a walk down the Filters menu, and see what kind of goodies are hidden there. In this final chapter will we discuss Render,Texture, Transform and unspecified plug-ins.
Render plug-ins
CML explorer:
Checkerboard:
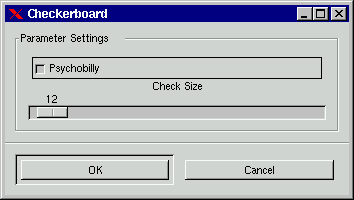
This plug-in creates Checkerboards - what else?
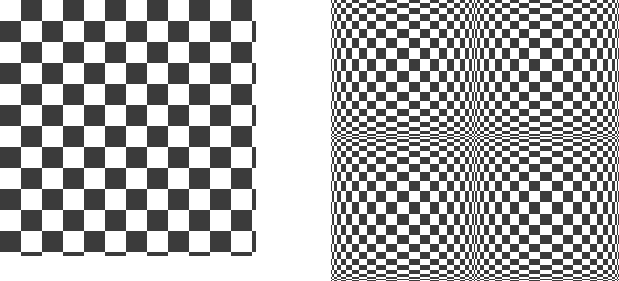
The Size slide controls the size of the checkers in pixels (X*Y pixels). If you choose to check "Psychobilly", you'll get pouting checkerbords... see pict 2. Size now represents the biggest tile in your checkerboard. E.g. say that your tile size is 4, then the middle tile (which is always the biggest tile) will be 4x4, and each Psychobilly tile will be 16x16 (because 4x4=16). The tile size follows the following algoritm 1,2,3,4...."tile size" ......4,3,2,1,
If you for exampel choose 12 as tile size, for an image that is 288x288, you will end up with four Psychobilly tiles, because 12x12 gives you tiles which are 144x144 pixels in size, and there can only be 4 144x144 tiles in a 288x288 image.
Figures:
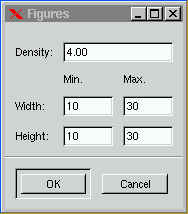
Figures creates random number of rectangles of different size and color in your image. You can constrain the rectangle size to Min/Max Width and Height. Density controls the amount of rectangles in your image. A low density value results in a low amount of rectangles, and a high value produces a whole lot of rectangels. This plugin can with success be used as a texture maker. 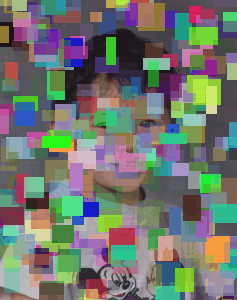
Flame:
Gfig:
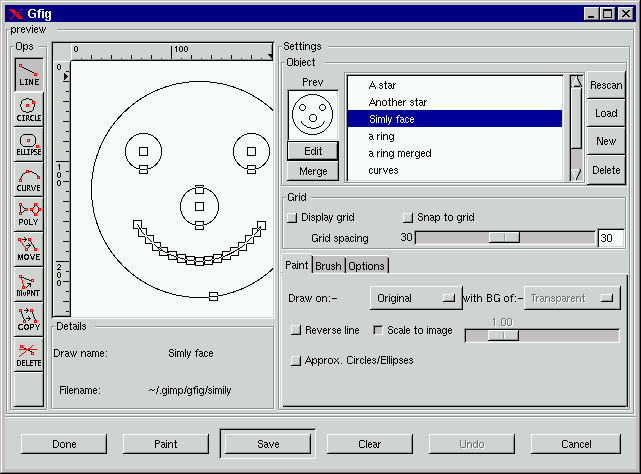
This is a wonderful plug-in, which adds basic drawing capabilities to Gimp. You can draw circles, lines, curves, ellipses and X- sided polygons (X >=3). The drawing can then be "rendered" into your image. The drawing objects have control points which can be moved/edited to control the shape of the object. There is no Bezier function to these control points, so this plug-in is mainly used to draw various geometrical shapes for your Gimp image. There is no fill option within the plug-in, so to fill a closed curve, you have to render to image, and then use the fuzzy select tool (magic wand)to select the shape, and the bucket fill to fill the selection.
The user interface is divided into a preview area with a drawing area and user tools, a settings area with object manipulation options, grid settings to control grids and a few tabbed folders to control paint options.
The Preview area: In "Ops" you'll find the drawing tools with which you can draw, delete, move, edit, and copy objects.
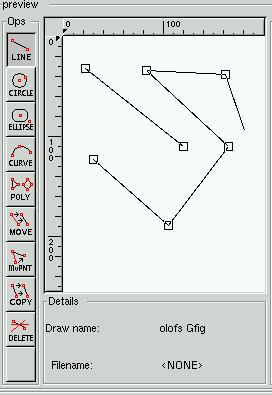
Lines: To draw a straight line, simply click where you want your line to begin, drag and release the mouse button when you want it to end. If you want a crooked line (built of several control points): hold Shift, this will make the control points glue together. E.g. hold Shift, click first point, move, click second point, move, click third point, release Shift, move, and click to get the final point.
Circle: Obviously this option lets you draw a circle. The start "click" is the centre of the circle.
Ellipse: Draws an ellipse. The start "click" is the centre of the ellipse
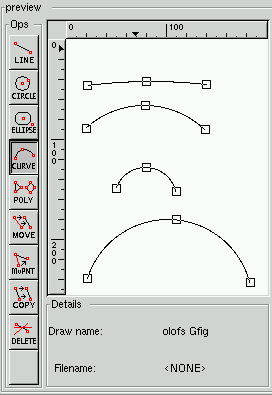
Curve: Draws an arch or a semi-circle. The object has three points (two end points and a middle point). To clear things up I will show you an example: First draw a curve where the curve points are in placed in a horizontal row. This will result in a straight line (1), you can look at this as a tiny segment of a huge circle. Now raise the middle point a bit, and the curve will become a low arch, it now represents a larger part of the circle(2), finally reduce the distance between the end points and you will find that the curve gets even more circular (3).
Poly:(gon) The defalult polygon is a triangle, but you can change this by double clicking on the icon. This brings up a dialog asking how many sides you want for your polygon.
Move: moves a single object or all objects in a drawing. To move a single object, just click at a control point and drag. To move all objects hold Shift, click somewhere in the drawing area and drag, doing this will cause all objects in the drawing area to move.
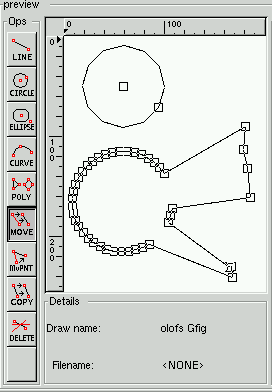
MvPNT: Lets you move a single control point or spline. This function lets you alter the shape of a object by moving a spline. As you may have noticed, you can't change the shape of a circle - you can only make it smaller or move it. A way around this problem is to use polygons. If you use a polygon with a lot of sides, you will get something very close to a circle. If you simply choose the MvPNT tool, you'll only change it the usual way, but if you hold Shift and the click at a control point with the MvPNT tool active, you'll break up the polygon into lines. Now you can drag at the "circle" splines any way you like.
Copy: Will copy an object. To use it, click and hold an object's control point, then drag the copy to where you want it.
Delete: Delets an object (the whole object, not just the control point)
Settings:
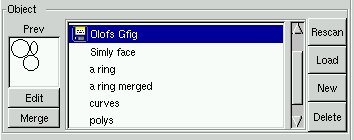
Objects: One of the nicest things with gfig is that you can save a whole bunch of drawings on disk. This makes it possible to create standard figures for your special needs. To create a new drawing, just click "New" and name it in the naming dialog. Now an empty drawing area will appear. As you see, the new drawing name is highlighted in blue, and there is a little diskette symbol at the left side of the name, indicating that the drawing hasn't been saved yet.
If you want to rename your drawing, simply double click on the name. If you right click on a name you'll get a menu where you can "Save", "Save as", "Copy" and "Edit" the drawing. To "Edit" a drawing, choose the name and either right click and select "edit" or press the "Edit" button. If you got some gfig drawings from internet or from a friend, you can copy them to the gfig directory (~/.gimp/gfig), press Rescan and they will appear in the name list. If you want to load a drawing outside of your gfig directory, press Load. This brings up an ordinary open file dialog where you can choose your gfig drawing. You can browse your drawings by highlighting them, and look at them in the "Prev" window. "Delete" pops up a dialog asking you if you want to delete the drawing, both the file and the name in the browser.
A very nice option is that you can merge gfig drawings. To do so, select a drawing and press Edit, then highlight the drawing that you want it to be merged with, and press merge. The selected drawing will now merge with the highlighted drawing. Only the Edit drawing will be altered - the highlighted drawing will not be changed.
There's also a command bar at the bottom of Gfig . "Done" is for when you want to exit gfig after you're done with it. "Paint" paints your gfig drawing into your Gimp image according to your settings. "Save" saves a gfig drawing. "Clear" erases your drawing area. "Undo" will undo your last operation. "Cancel" lets you exit Gfig, and drop all that you have done.


Grid: Controls the support grids in your gfig drawing. You can set the grid size in X*X pixles (if you have rect in the option tabfolder selected) with the grid spacing slide. You can also set if you want to display the grids and if you want your objects to snap to grid. If you have drawn objects without snap and then turn it on, the objects will snap at one end only. If you move all your objects with snap enabled, an invisible middle point will be calculated and that point will snap to the grid system.
The Tab folders:
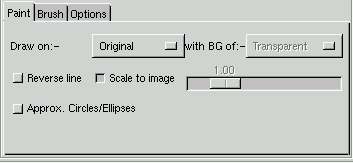
Paint: "Draw on" lets you choose where you want your drawing to end up. "original" paints the drawing on the original image. "New" creates a new layer where the drawing will be painted. "Multiple" creates a new layer for each object in your drawing. If you choose to draw to New or Multiple, you can also set what type of background you want in the new layer. There are four options: Transparant, Background (fills the background in the new layer with the current background color in the toolbox), White and Copy which copies the original image to the new layer, if you choose multiple, the previous layer will be copied to the new layer.
Examples:
- Input julius.tif and a gfig drawing with 3 objects. Draw on Multiple with Bg Transparant: This setting results in this: Background Julius, layer 0 the first draw object, layer 1 the second draw object, layer 2 the third draw object.
- Input Julius.tif and a gfig drawing with 3 objects. Draw on Multiple with Bg Copy: This setting results in: Background Julius, Layer 0 Julius plus object 1, Layer 1 Julius plus object 1 and 2, Layer 2 Julius plus object 1,2 and 3.
This obviously fits like a glove when you want to make gif animations! (se chapter X)
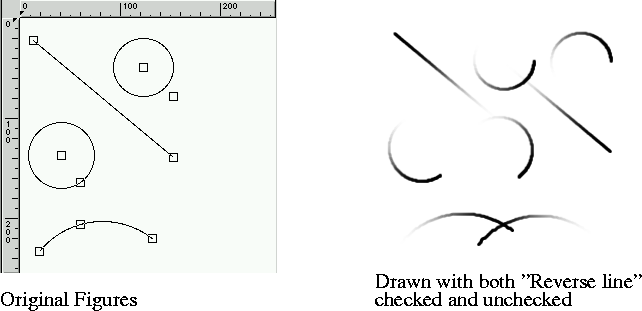
Reverse line: With this option you can control the direction of brush strokes. Normally, the "rendering" of your stroke goes from the first control point in your line to the last one.. If you set brush fade out to 20 in the brush tab folder, the stroke will fade out after 20 pixels (counted frome the first control point). If you check "Reverse line" it will fade out frome the last control point instead of the first. This option works with lines, curves and polygons. When it come to polygons, fading goes clockwise frome the "first" control point, if reverse line is unchecked.
Approx. Circles/Ellipse: If you check this button, fading also applies to circles and ellipses. The fading goes clockwise from the "first" control point.
Scale to image: The drawings can be set to fit the image, or just get bigger or smaller. Just uncheck and drag the slider and you will scale up/down. This is nice because you can easily magnify your drawings and work with small details. When you are done, you can just check "Scale to image" to zoom out.
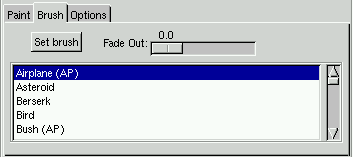
Brush: In this tab folder you can set what kind of brush you want to paint with. A tip is to bring up the "Select brush dialog" so you can preview the brushes, and also set the spacing of the brush, otherwise gfig will use the default spacing of the brush you select. To select a brush, highlight it and press "Set brush". Fade out controls after how many pixels the stroke will fade out, if it's set to 0.0, no fading will appear.
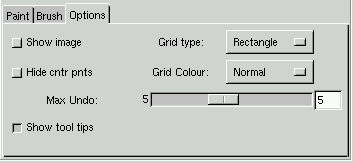
Options: Here you can set various options, like if you want the image to appear in the preview drawing area, if you want to hide the centre point in circles/ellipses/polygons, if you want tool tips, how many levels of undo you want, the grid color of your grid system and whether you want your grid system to be rectangular or circular(polar).
.
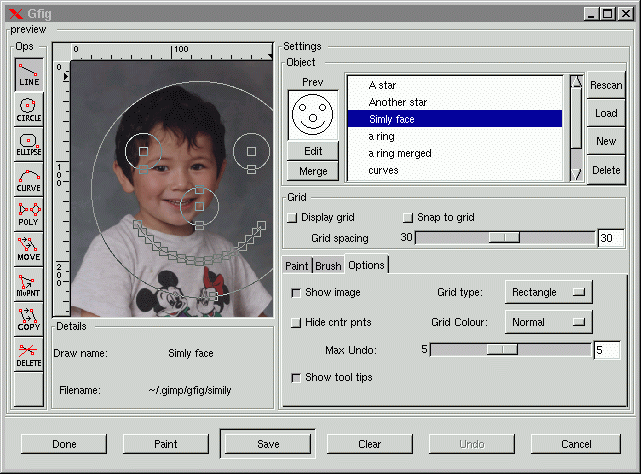
To quote the author of this plugin; Andy Thomas, this plugin is still far from complete. To see what's in his TODO list, read the README file. If we could add some wishes to his TODO list, it would be Bezier functions in the control points so you can control the shape of the curves more precisely, a fill function so you can fill closed shapes with a gradient or a color, and finally a way to merge control points.
Grid:
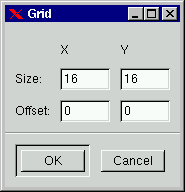
With this filter you can easily create a grid system. "Size" obviously controls the size of the grids in pixels. "Offset" controls where (in pixels) on the image the first unbroken square will be drawn. 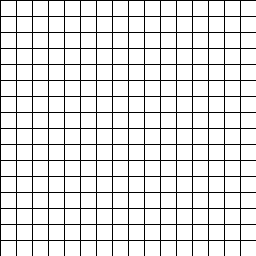
Ifs Compose:
Mandelbrot Fractal:
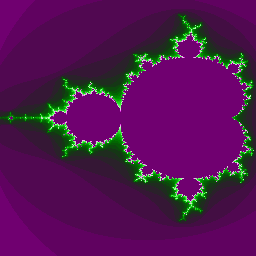
I will try to explain this fractal generator in a non-mathematical way, so that people who are unfamilar with advanced mathematics will understand what it does. These fractal images can be used as patterns, textures etc.. or simply as interesting images.
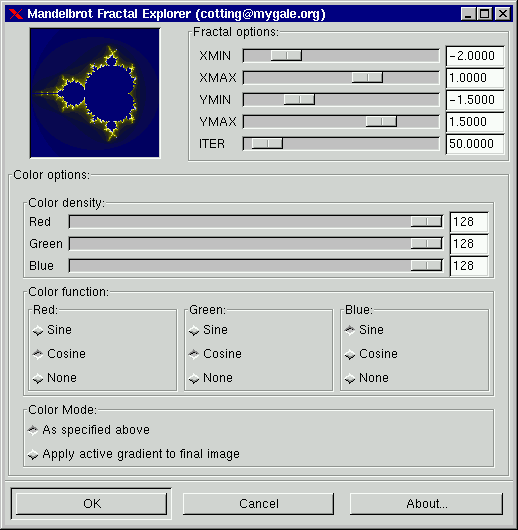
There are a few fractal options:
XMin and Xmax, Xmin controls how streched the fractal will be to the right, and Xmax controls the strech in the left direction.
Ymin and Ymax, Ymin controls how much the fractal will strech upwards (positive Y values in a coordinate system) and Ymax controls how much it will strech downwards (negative Y values).
INTR controls the level of detail in the fractal. It's not always best to have a high level of detail. Often a fractal will get more interesting when created with lower values. I have found that in the range between 16 and 70 you will find some very nice fractal patterns.
Color options: In a fractal you have three parts. An outer part, an inner part and the "fractal" between them. The Sine function controls the color of the inner and outer parts, while the Cosine function controls the "fractal" part. "None" means that you don't want a particular RGB color in your fractal. You can by checking and unchecking the three color functions choose what color you want for the different parts of your fractal. You can also set the density of color with the slides in "Color density". This makes it possible to set any color you want to your fractal.
Color mode: either you use the color mode you have specified in Color options, which you also see in the preview window, or you use the active gradient in the gradient editor. This option will map the gradient over your fractal, and you can achive quite fantastic looking fractals this way.
Julia Fractal:
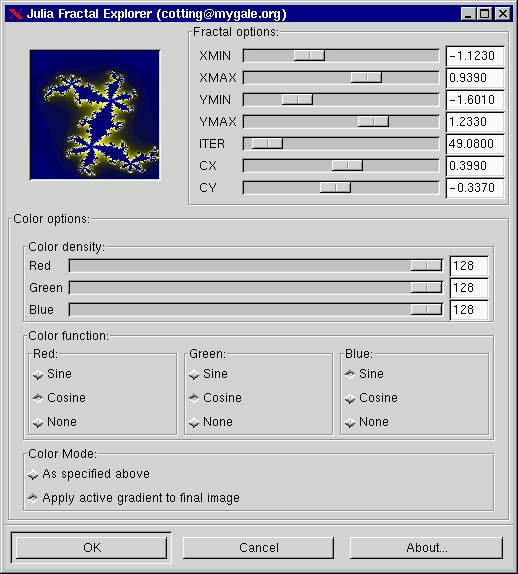
The difference between Mandelbrot and Julia fractals, is the shape of the fracal and the fact that you have some more control options with Julia. A Julia fractal is built on two different fractals and this is where the options CX and CY comes in. CX values between -5 and 0 control the distance of the two parts in a horisontal way, low values (-5) takes them apart totally, and high values (0 ) merges them totally. Values between 0 and +5 will do the same, but in a vertical direction. CY has a similar control mechanism, but not in a horizontal/vertical way. CY works in 45 deg and 135 deg direction. 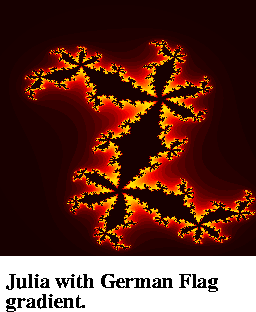
Magic Eye:
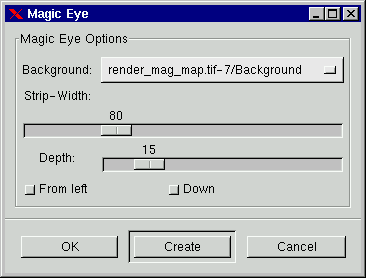
Magic Eye is a way to create 3D stereo images in Gimp. I think everybody have seen 3D images in magazines, a strange image that you have to look at in a certain way, and up pops a flower or something. Now you can do the same thing in Gimp. Here is how it works:
- First create a grayscale map image, ( the image containing the 3D thing that will popup)

- Now create a masking image ( this is the image which will mask the map image). The image must have some sort of texture, if this is going to work properly. The texture from this image will also cover the popup image.
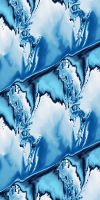
- Now bring up the filter from the map image.
- Select the mask image in the "Background" menu
- Set how many columns of the mask image you want to use in the "Strip" slide( nice values seems to be between 50 and 100). The columns are counted from the left.
- Remember that the first "Strip"/2 columns must be left black.
- Depth is the grade of 3D you want to have (or how much you want thing to popup).
- "From left" will create your image from the left instead of from the middle of the image.
- Down will carve the image instead of popping it up.
- You have now hopefully choosen Depth, Mask and Strip.
- I have often noticed that a 3D image will be easier to see if you create it from the left.
- Press OK and the new 3D image will appear

Remember that the whiter the object is in the map image, the higher it will pop up in the stereo image.
Maze:
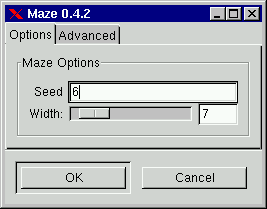
Generates a maze. You can specify random seed and what size the walls will have in pixels. If you call this filter again with Alt-F, the random seed will be different, and you will end up with a different maze. This is quite good because you can then call it again and again until you find a maze that fits your purposes. 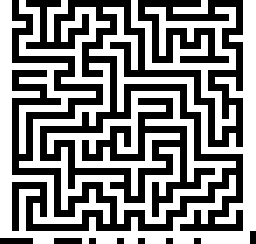
Plasma:
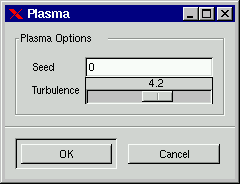
Plasma generates a colorful plasma cloud, which can be used for textures etc... You can control the turbulence in the plasma cloud. High values gives a hard and cold feeling to the cloud, low values give you a soft and warm feeling to the cloud. You can also set what random seed you want for your plasma cloud. 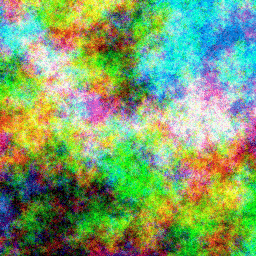
Qbist:
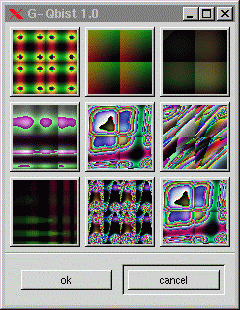
This filter generates textures, much like KPT Texture Explorer. The "original" texture is in the middle and different variations of surrround it. If you like one of the alternative textures, click on it and it will turn up in the middle with variations on its specific theme surrounding it. When you have found the texture you want, click on it and then click OK, the texture will now appear on your drawable. 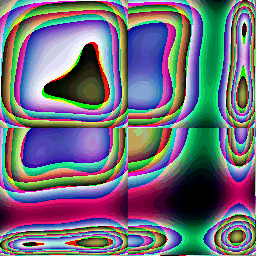
Solid Noise:
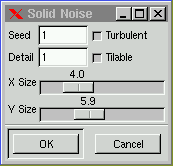
This is a great texture maker. X and Y size control texture size in X and Y direction. "Seed" is the random seed you want in your noise. "Detail" controls the amount of detail in the noise, higher values gives you higher level of detail and the noise seems to be made of small particles, which makes the noise feel "hard", a low value makes noise more soft. If you check "Turbulent" you'll get a noise which looks much like oil on water. With a low value of detail, it makes small turbulences in every detail of the noise. If you check "tileable" you'll get a noise which can be used as tiles, e.g you can use it as a background in a HTML page, and the tile edges will be invisible. 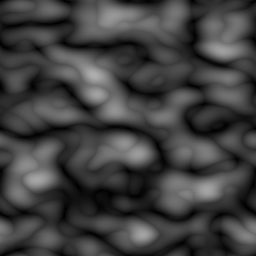
Stereogram:
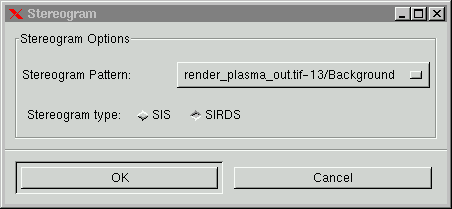
Creates a stereogram noise of a grayscale image. It works like this:
- create a grayscale image.
- bring up the plugin
- choose your background
- choose SIRDS
- press OK
Now you have a stereogram noise
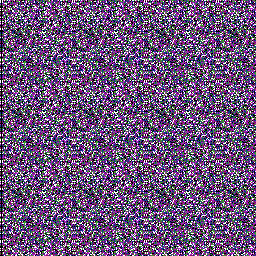
If you check "SIS" the background will be used as a pattern. In SIRDS the background only has a minor effect., but in SIS the background is the only pattern that will be used.
Textures plug-ins
Diffraction patterns:
Sinus:
Transform
Rotate
A simple way to rotate your image (single layered) 0, 90, 180 and 270 deg. Quite nice when you are scanning images.
Unspecified plug-ins
Holes:
[Top] [Prev] [Next] [Bottom]
karin@frozenriver.ale.se
Copyright © 1997, Karin Kylander